samedi 27 juillet 2019

Living It


Hello friends!

I hope you had a fantastic week! I'm stopping by today to share a new page featuring the Be You collection by Pinkfresh Studio and a photo of my youngest girl posing near the Traveling Man sculpture in Dallas last spring. The Be You colors look great with this sweet pic!

Bonjour à tous!

J'espère que vous avez passé une bonne semaine! Je suis de passage aujourd'hui pour partager une nouvelle page réalisée avec la collection Be You de Pinkfresh Studio et une photo de ma petite dernière qui prend la pose près de la sculpture du Traveling Man à Dallas. Les couleurs de cette collection vont à merveille avec cette jolie photo!


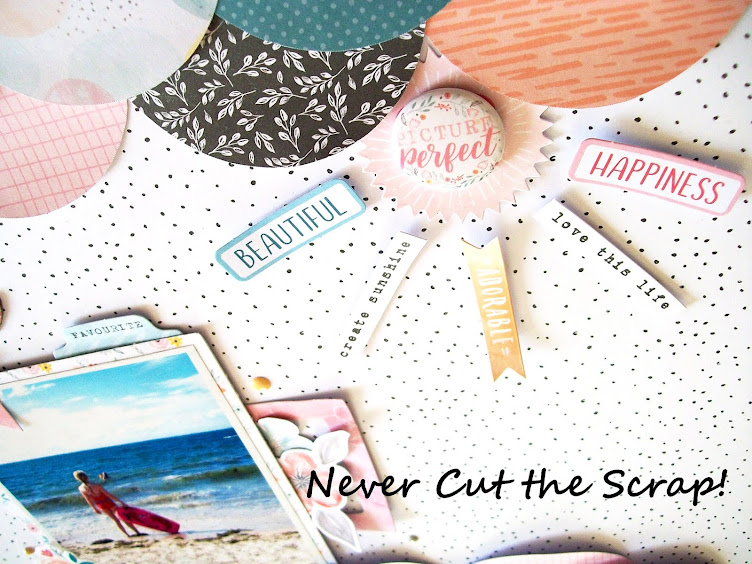
I love using patterned papers for my backgrounds. Here I went with the Lovely paper to echo the gray bits in the photo. I wanted to spice up the background with colorful triangles and started drawing squares in several 6x6 papers using Be You ephemera pieces as templates. I cut the squares and then cut them again in half diagonally so as to get triangles. After moving my paper triangles around the page for a bit, I finally decided to arrange them like diamonds on my layout.

J'adore utiliser des papiers à motif pour mes fonds. Pour cette page, j'ai choisi le papier Lovely pour aller avec les touches de gris sur la photo. J'ai voulu pimenter un peu le fond avec des triangles colorés et je me suis affairée à dessiner des carrés dans plusieurs feuilles du paper pad en utilisant des découpes de l'ephemera pack Be You comme gabarits. J'ai découpé les carrés que j'ai ensuite à nouveau coupés en deux pour obtenir des triangles. Après avoir essayé différents placements, j'ai finalement décidé de les positionner en losange sur toute la page.


I matted the picture with another 6x6 paper and adhered it in the center of the page with foam squares to make it stand out from the background. I then turned to embellishing the diamonds using Be You die cuts, puffy stickers, wood buttons, and cute tassel bows. For the title, I used a puffy sticker that I placed on the right side of the photo and I also added the location on the other side of the picture using puffy alpha stickers and a journaling card from the ephemera pack. Finally, I wrote the date on a tab that I tucked under the photo and my layout was complete.

J'ai matté la photo avec une feuille du paper pad et je l'ai collée au centre de la page avec des carrés de mousse 3D pour la faire ressortir. Je suis ensuite passée à la partie embellissement et j'ai décoré les losanges avec des die-cuts, des puffy stickers, des boutons en bois et des jolis nœuds de la collection. Pour le titre, j'ai utilisé un puffy sticker que j'ai placé à droite de la photo et j'ai également ajouté le lieu de l'autre côté de la photo avec des lettres autocollantes Be You que j'ai collées sur une carte de l'ephemera pack. Pour terminer, j'ai écrit la date sur un onglet que j'ai glissé sous la photo.


I hope this layout inspires to have fun with patterned papers. Thanks so much for visiting my blog today! See you again soon!

J'espère que cette page vous donnera envie de vous amuser avec vos papiers à motif. Merci beaucoup de votre visite et à bientôt!


Elodie

jeudi 18 juillet 2019

Play


Hi there!

I'd like to share a new layout with you today. I used the Whimsical collection by Paige Evans & Pink Paislee and made a fun page about my little one playing on the swings in our garden a couple of days ago. Love her sweet, happy face!

Bonjour!

J''aimerais partager une nouvelle page avec vous aujourd'hui. Je me suis amusée avec la collection Whimsical de Paige Evans & Pink Paislee et j'ai réalisé une page colorée avec une photo de ma petite dernière sur la balançoire de notre jardin il y a quelques  jours. Quelle tête de coquine!


I started my layout by looking for papers that would go with my photo and chose papers 14, 15, 18 and 23. I decided to use Paper 23 for my background and to cut circles in the other ones. I placed my paper circles on the edges of the page to give it a fun and eye-catching look and then adhered the photo with foam squares.

J'ai commencé par chercher des papiers qui iraient avec ma photo et j'ai choisi les papiers 14, 15, 18 et 23. J'ai décidé d'utiliser le papier 23 comme fond et j'ai découpé des cercles dans les trois autres. J'ai placé mes cercles en papier sur les bords de ma page pour lui donner une touche originale et j'ai ensuite collé la photo avec des carrés de mousse 3D.


Time to start embellishing! I topped the picture with a chipboard word for the title and I adorned the circles with tone-on-tone embellies. I used die cuts, chipboard and cardstock stickers, pretty flowers and leaves from the floral embellishment pack, and a cute butterfly charm. I finished my sweet page by adding a couple of Whimsical enamel shapes here and there.

Je suis ensuite passée à la partie embellissement. J'ai surmonté la photo d'un mot en chipboard pour le titre et j'ai décoré les cercles avec des embellissements en ton sur ton. J'ai utilisé des die-cuts, des autocollants en cardstock et en chipboard, des fleurs et des feuilles du floral embellishment pack et une breloque papillon. Pour finir, j'ai ponctué ma page de quelques enamel shapes de la collection.


Thank you for joining me today! Have a lovely day!

Merci de vous être joints à moi aujourd'hui! Je vous souhaite une belle journée!


Elodie


samedi 13 juillet 2019

My Darling


Hello friends!

I hope you had a wonderful week! I'm back with a new layout all about my oldest girl. I used a photo snapped in Venice two years ago and the Wild at Heart collection by Cocoa Vanilla Studio. I'm still in love with this gorgeous line!

Bonjour à tous!

J'espère que vous avez passé une excellente semaine! Je suis de retour avec une nouvelle page dédiée à ma fille aînée. J'ai associé une photo prise à Venise il y a deux ans avec la collection Wild at Heart de Cocoa Vanilla Studio. J'aime toujours autant cette belle collection!


I started by looking for a background and chose the Artisan paper with its lovely woodgrain pattern. I decided to spice it up a bit by adding a piece of the beautiful Luscious sheet along the top left corner of the page. I then arranged pretty chipboard frames from the collection on my layout and placed the photo on the right side of the page using foam squares to make it pop.

J'ai commencé par chercher un fond et j'ai opté pour le papier Artisan avec son joli motif boisé. J'ai décidé de le relever un peu en ajoutant un morceau du beau papier floral Luscious le long du coin supérieur gauche. J'ai ensuite disposé des cadres en chipboard de la collection sur ma page et j'ai ajouté la photo à droite avec des carrés de mousse 3D pour la faire ressortir.


Next I got busy adorning the frames with pretty Wild at Heart embellies. I used wood veneer words and hearts, fussy cut butterflies, die cuts, cardstock stickers and a cute flair button. For the title, I used a banner sticker that I framed with photo corners from the ephemera pack. Finally, I topped my picture with a cardstock heart and added a chipboard sticker under the photo.

Je me suis ensuite affairée à décorer les cadres avec de jolis embellissements Wild at Heart. J'ai utilisé des mots et des cœurs en bois, des papillons découpés dans le papier Patchwork, des die-cuts, des autocollants en cardstock et un badge. Pour le titre, j'ai encadré une bannière autocollante avec des coins de photo de l'ephemera pack. Enfin, j'ai surmonté la photo d'un cœur en cardstock et j'ai ajouté un chipboard autocollant juste en dessous.


I hope this layout inspires you to use frames on your projects. Thank you so much for visiting my blog today! Have a great weekend!

J'espère que cette page vous donnera envie d'utiliser des cadres sur vos projets. Merci de votre visite! Je vous souhaite un très bon weekend!


Elodie


mardi 2 juillet 2019

12 Birthday Card


Hi there!

I hope you're having a great week so far! I'm popping in to share a birthday card I made for my oldest girl who turned 12 yesterday. Yay!

Bonjour!

J'espère que vous passez un bon début de semaine! Je suis de passage pour partager une carte d'anniversaire que j'ai faite pour ma fille aînée qui a fêté ses 12 ans hier.


For this card, I used the Horizon collection by Paige Evans & Pink Paislee and started by folding a sheet from the 6x8 paper pad in half to create the base. I then topped my card panel with a rectangle that I cut in another 6x8 paper. I scraped the edges before sticking it down to add detail and texture to my card. I added a half circle that I cut in a colorful paper from the 6x8 paper pad along the right border of the card and I adorned it with pretty Horizon flowers and leaves, cute chipboard hearts and Whimsical foam Thickers that I placed in a frame. I put the finishing touch to my girly card with some white enamel dots.

Pour ma carte, j'ai utilisé la collection Horizon de Paige Evans & Pink Paislee et j'ai commencé par plier une feuille du paper pad en deux pour créer la base. Je l'ai ensuite surmontée d'un rectangle découpé dans une autre feuille du paper pad. J'ai usé les bords du rectangle avec des ciseaux pour donner du détail et de la texture à ma carte. J'ai ajouté un demi-cercle découpé dans une feuille colorée du paper pad le long du bord droit et je l'ai orné de jolies fleurs et feuilles de la collection, de cœurs en chipboard et de Thickers en mousse Whimsical que j'ai disposés dans un cadre. J'ai apporté la touche finale à ma carte avec quelques enamel dots blancs.


Thank you so much for joining me today! Have a wonderful day!

Merci beaucoup de vous être joints à moi aujourd'hui! Passez une excellente journée!


Elodie