samedi 25 août 2018

Hello Cards - Spellbinders


Bonjour!

Je suis de retour aujourd'hui pour partager mon deuxième projet réalisé avec la superbe collection Blooming Garden de Marisa Job et Spellbinders. Je me suis amusée avec les panneaux et les fleurs de la collection et j'ai fait un set de cartes colorées.

Hi there!

I'm back today to share my second project using the gorgeous Blooming Garden collection by Marisa Job and Spellbinders. I played with the beautiful floral and panel dies and I made a set of colorful hello cards.


Pour la base de mes cartes, j'ai utilisé des feuilles de paper pad que j'ai plié en deux. J'adore cette taille de carte!

To make the bases of my cards, I used 6x6 patterned papers that I folded in half to get 6x3 cards. I just love that fun size!


J'ai ensuite coupé des rectangles dans d'autres feuilles de paper pad et je les ai placés sur le dessus de mes cartes pour faire de jolies superpositions.

Next I cut rectangles in more 6x6 papers and I placed them on the top of my cards to make pretty layers. Time to start die-cutting now!


Pour ma première carte, je suis partie sur du vert et j'ai découpé un joli panneau floral dans un papier à motif vert à l'aide des dies Heart Flower Box. J'ai coupé mon panneau en deux et je l'ai collé en bas de la carte. Pour le titre, j'ai utilisé une découpe d'ephemera pack  que j'ai placé en haut de la carte. J'ai ensuite découpé une belle branche dans un autre papier vert avec le die Swirl Leaf Branch et je l'ai collée en travers de la carte pour souligner le titre. Enfin, j'ai parsemé ma carte de jolies fleurs réalisées avec les dies Rose Buds et je les ai ornées d'autocollants et de sequins.

For my first card, I went with green and I die-cut a pretty floral panel in a green patterned paper using the Heart Flower Box die set. I cut my floral panel in two and adhered it at the bottom of the card. For the title, I used an ephemera piece that I placed at the top of my card. I then die-cut a beautiful branch in another green paper with the Swirl Leaf Branch die and I adhered it across the card to underline my title. Finally, I scattered pretty Blooming Garden flowers from the Rose Buds die set on my card and I topped them with stickers and sequins from my stash.


Pour la deuxième carte, j'ai utilisé principalement du rose et j'ai découpé un superbe panneau dans un papier à motif rose foncé à l'aide du die Swirl Happy Birthday Frame. Je l'ai coupé en deux, j'ai découpé l'intérieur pour en faire un cadre et je l'ai placé sur la carte. J'ai ensuite rempli mon cadre de jolies fleurs découpées dans des papiers colorés avec les dies Heart Flower Box et j' en ai ornées quelques-unes de sequins et d'enamel dots dorés. J'ai apporté la touche finale à ma carte avec quelques sequins noirs et un bouton en bois pour le titre.

For the second card, I focused on pink and I die-cut a beautiful panel in a dark pink paper using the Swirl Happy Birthday Frame dies. I cut it in two, cut it again to turn it into a frame and placed it on the top of my card. Next I filled my frame with lovely die-cut flowers from the Heart Flower Box die set and I adorned some of them with sequins and glittery enamel dots. I put the final touch to my card with a couple of black sequins and a wood button for the title.


Matériel Spellbinders / Spellbinders supplies:

Autre matériel / Other supplies:
Amercian Crafts & Dear Lizzy Stay Colorful collection; Pinkfresh Studio Be You wood button; enamel dots; sequins.


Les dies Blooming Garden sont superbes et j'ai adoré utilisé cette collection. Merci de vous être joint à moi aujourd'hui! J'espère que ces cartes vous donneront envie de créer avec cette belle collection de dies!

The Blooming Garden dies are just so pretty and I really enjoyed creating with them. Thank you so mcuh for joining me today! I hope these cards inspire you to play with this beautiful collection!


Elodie


vendredi 24 août 2018

Into the Wild - Pink Paislee


Bonjour!

Vous pouvez me retrouver aujourd'hui sur le blog de Pink Paislee avec un tout nouveau projet! Je me suis amusée avec la très jolie collection Pick-Me-Up et j'ai fait une page haute en couleur avec une photo de ma petite dernière face à face avec quelques vaches irlandaises lors de notre voyage en Irlande l'année dernière. La collection Pick-Me-Up était toute désignée pour aller avec cette photo rigolote!

Hi everyone!

I'm sharing a brand new project on the Pink Paislee blog today! I played with the super pretty Pick-Me-Up collection and made a colorful page using a photo of my youngest daughter face-to-face with a couple of Irish cows during our trip around Ireland last year. I just had to use the bright Pick-Me-Up line with this fun picture!


Pour cette page, je voulais utiliser les mini paper pads pour créer mon propre fond. J'ai commencé par chercher un papier clair pour aller avec les cartes et embellissements colorés de la collection et j'ai finalement opté pour le papier 20.

For this layout, I wanted to use the 2x2 mini swatch books to create my own background. First, I looked for a light background paper to go with the colorful 2x2 sheets and the bright Pick-Me-Up embellies and I finally settled on Paper 20.


J'ai ensuite placé des cartes provenant des mini paper pads sur mon papier de fond de manière à former des losanges. J'ai collée la photo à gauche de la page avec de la mousse 3D pour la faire ressortir et je l'ai ornée de quelques embellissements de la collection: une fleur découpée dans un papier à motif, un onglet et un cadre de l'ephemera pack ainsi que des autocollants en cardstock et en chipboard.

Then I placed 2x2 cards from the mini paper pads on my background paper so as to make diamonds. I adhered the photo on the left side of the page with foam tape to make it pop a bit more and I adorned it with a few embellishments from the collection: a fussy cut flower, a tab and a frame from the ephemera pack, as well as cardstock and chipboard stickers.


Pour le titre, j'ai utilisé des Thickers Pick-Me-Up que j'ai placé le long d'un de mes losanges en papier. J'ai également décoré les losanges avec des autocollants, un die-cut et une fleur. Je les ai collés avec des carrés de mousse 3D pour les faire ressortir sur les cartes colorées.

For the title, I used bright Pick-Me-Up Thickers that I placed along one of my paper diamonds. I also embellished the diamonds with stickers, a die cut, and a fussy cut flower. I adhered them with foam squares to make them stand out from the colorful 2x2 cards.


J'ai apporté la touche finale à ma page avec quelques rub-ons et des sequins dorés du haberdashery pack. J'adore utiliser les bords de mes pages pour créer des designs originaux!

I finished off my page with a few rub-ons and gold sequins from the haberdashery pack. I love using the edges of the page to create eye-catching designs!


Les mini paper pads sont parfaits pour apporter de la couleur et créer des fonds tape-à-l’œil. J'espère que ma page vous donnera envie de les utiliser sur vos projets! Merci de votre visite et à très vite!

The 2x2 mini swatch books are perfect to create fun backgrounds and add color to a layout. I hope you are inspired to use them on your projects! Thanks so much for stopping by! Have a lovely day!


Elodie


lundi 20 août 2018

So Lovely - Spellbinders


Bonjour!

Je commence cette nouvelle semaine avec une page que j'ai réalisée pour Spellbinders. J'adore inclure des fleurs dans mes projets et j'avais hâte d'utiliser la belle collection Blooming Garden de Marisa Job. Pour mon premier projet avec cette collection, j'ai été inspirée par les jolis dies floraux et j'ai fait une page douce et féminine avec une photo de ma petite dernière dans notre jardin au printemps dernier.

Hello there!

I'm kicking off a new week with a layout that I made for Spellbinders. I have a thing for flowers and I love using them on my projects. So I was excited to play with the beautiful Blooming Garden collection by Marisa Job! For my first project using this line, I was inspired by the pretty floral dies and I made a soft and girly page with a photo of my youngest girl in our garden last spring.


J'ai commencé par découper quatre panneaux avec le superbe die Swirl Lattice Panel et la machine de découpe Platinum 6 et j'ai réalisé deux napperons en plaçant un panneau à travers un autre. J'ai disposé un napperon en haut de la page, j'ai coupé l'autre napperon en deux et j'ai collé les deux parties sur les bords. J'aime la douceur qu'ils apportent à la page et la manière dont ils ressortent sur le fond clair!

I started by die-cutting four panels using the gorgeous Swirl Lattice Panel die and the Platinum 6 die-cutting and embossing machine and I made two doilies by placing a panel across another one. I added a doily at the top of the page, cut the other one in half and adhered it on the edge of my layout. I love the soft and delicate look they give to the page and how they pop against the light background!


J'ai placé ma photo sur le napperon du haut avec de la mousse 3D et je suis passée à la partie embellissement. J'ai découpé de belles fleurs et branches dans plusieurs papiers à motif à l'aide des dies Rose Buds et Hexagon Petal Box et je les ai disposées sur et autour de la photo. J'ai collé certaines avec de la mousse 3D et je les ai légèrement recourbées pour apporter du relief.

I placed my photo on the top doily with foam tape and turned to the embellishing part. I die-cut pretty Blooming Garden flowers and branches in several patterned papers using the Rose Buds and Hexagon Petal Box dies and I arranged them on and around the picture. I adhered some of them with foam squares and bent them up a bit for dimension.


J'ai ajouté des feuilles dorées autour de la photo et j'ai orné quelques fleurs de sequins pour apporter une touche scintillante à ma page. Pour le titre, j'ai utilisé une carte que j'ai glissé sous la photo.

I added gold leaves to my photo cluster and topped a couple of flowers with sequins from my stash to give a shiny touch to the page. For my title, I used an ephemera piece that I tucked under the picture.


J'ai également embelli mes napperons avec des boutons en bois et j'ai ajouté un papillon découpé dans un papier à motif en haut de la page et de jolies feuilles réalisées avec les dies Hexagon Petal Box en bas. J'ai apporté la touche finale à ma page printanière avec quelques gouttes d'encre noire.

I also embellished my patterned paper doilies with wood buttons from my stash and I added a fussy cut butterfly at the top of the page and cute Blooming Garden leaves from the Hexagon Petal Box die set at the bottom. I put the finishing touch to my spring layout with a few droplets of black ink.


Matériel Spellbinders / Spellbinders supplies:
Autre matériel / Other supplies:
Crate Paper & Maggie Holmes Flourish collection; Artemio wood buttons; Pigment Izink ink; sequins.


J'ai adoré faire cette page avec les dies Blooming Garden. Ils sont si délicats et élégants! Merci de vous être joint à moi aujourd'hui! Rendez-vous en fin de semaine pour mon deuxième projet avec cette belle collection!

I loved putting this page together using the Blooming Garden dies. They're just so delicate and elegant! Thank you so much for joining me today! See you again at the end of the week with my second project featuring this beautiful collection!


Elodie


vendredi 17 août 2018

Together - Cocoa Vanilla Studio


Bonjour à tous!

Je suis de retour avec une nouvelle page que vous pouvez retrouver aujourd'hui sur le blog de Cocoa Vanilla Studio. Pendant quelques jours, nous allons mettre l'accent sur les projets monochromatiques. Pour ma page, j'ai choisi la couleur orange et j'ai utilisé la belle collection More than Words ainsi qu'une photo de ma petite dernière avec son papa en Irlande l'année dernière.

Hi friends!

I have a brand new CVS layout to share with you today. The next couple of days are going to be all about monochromatic projects on the Cocoa Vanilla Studio blog. For my page, I went with orange and I used the gorgeous More than Words collection along with a photo of my little one and her dad snapped in Ireland last year.


J'ai commencé par rassembler des papiers et embellissements oranges, noirs et blancs de la collection. Pour le fond, j'ai choisi le verso du joli papier Radiant, j'ai coupé les bords et je l'ai collé sur la feuille Sketchbook. J'aime beaucoup la douceur de ce fond!

I started my layout by looking for black, white and orange papers and embellies in my More than Words stash. For the background, I picked the reverse side of the pretty Radiant paper, trimmed the edges and backed it with the Sketchbook sheet. I love how soft this background looks!


Je me suis ensuite affairée à faire des demi-cercles en papier pour créer une spirale sur ma page. J'ai d'abord dessiné et découpé des cercles de deux tailles différentes dans une feuille noire du paper pad et je les ai coupés en deux pour obtenir des demi-cercles. J'ai ensuite collé la photo au centre de la page avec de la mousse 3D.

Next I got busy making scallops to create a spiral on my page. I drew and cut several circles in two different sizes in a black paper from the 6x6 paper pad and I cut them again in half to get semicircles. I then adhered the photo in the center of the page with foam tape.


J'ai recourbé légèrement mes demi-cercles pour plus de relief et je les ai placés tout autour de la photo de manière à former une spirale. J'ai ensuite décoré ma spirale avec de beaux papillons découpés dans la feuille Gossamer. Ici encore, je les ai pliés légèrement avant de les coller pour les faire ressortir.

I bent up the scallops a bit for dimension and I placed them all around the picture so as to get a spiral. I then adorned my scalloped spiral with beautiful fussy cut butterflies from the Gossamer paper. Here again, I bent them up before sticking them down to make them pop off the page.


J'ai orné la photo avec de jolies fleurs de l'ephemera pack et j'ai aussi ajouté des enamel hearts oranges près de la photo et sur un des papillons. J'adore la manière dont cette spirale noire attire l’œil sur ma photo!

I embellished the picture with pretty flowers from the ephemera pack and I also added enamel hearts near the photo and on one of the butterflies. I really like how this black spiral draws the eye to my picture!


Pour finir, j'ai ajouté le titre en bas de la page. J'ai fait un cluster en superposant quelques autocollants et un autre enamel heart.

Finally, I added the title at the bottom of the page. I made a little cluster by layering a couple of stickers from the accessory sticker sheet and a cute enamel heart.


Merci de vous être arrêté par ici! J'espère que ma page vous donnera envie de vous essayer aux projets monochromatiques avec vos papiers et embellissements Cocoa Vanilla Studio!

Thank you so much for stopping by today! I hope this layout inspires you to give monochromatic projects a try using your CVS supplies!


Elodie


jeudi 16 août 2018

Yay - Pink Paislee


Bonjour!

Je suis de passage pour partager un nouveau projet que vous pouvez retrouver aujourd'hui sur le blog de Pink Paislee. J'ai fait une page colorée avec la collection Confetti Wishes ainsi qu'une photo de ma grande qui a gagné une compétition de gym il y a quelques mois. Cette collection est parfaite pour documenter les moments heureux de la vie quotidienne!

Hello everyone!

I'm popping in to share a new project that is up today on the Pink Paislee blog. I made a colorful page all about my oldest daughter who won a gym competition a few months ago using the bright Confetti Wishes collection. This line is just perfect to document special moments and happy memories!


J'aime beaucoup utiliser des bandes de papier à motif sur mes pages pour créer des designs originaux. Ici, j'ai coupé des bandes en bas de plusieurs feuilles 30x30 et je me suis mise à la recherche d'un papier de fond. Pour aller avec mes bandes colorées, je suis partie sur un fond uni et j'ai choisi le papier 06.

I love using paper strips on my layouts to create fun designs. Here I cut strips at the bottom of several 12x12 patterned papers and started looking for a background paper. To go with my colorful strips, I went with a solid background and chose Paper 06.


J'ai recourbé les bandes légèrement pour plus de relief, j'en ai placé cinq en bas de la page et j'en ai ajouté trois verticalement sur le côté gauche. J'ai matté ma photo avec une feuille du paper pad et un napperon et je l'ai collée avec de la mousse 3D en bas de la page, à la jonction des bandes. J'aime beaucoup la façon dont ces bandes colorées attirent l'attention sur ma photo!

I bent the strips up for dimension, placed five of them at the bottom of the page and added the remaining three vertically on the left side. I backed my black & white photo with a paper from the 6x6 paper pad and a doily from my stash and I adhered it with foam tape at the bottom of the page where the strips meet. I like how the bright strips draw the eye to my picture!


Je suis ensuite passée à la partie embellissement. J'ai orné la photo avec des fanions du sticker book, de jolies fleurs en chipboard et un nœud rose de la collection Take Me Away que j'ai surmonté d'un autre autocollant en chipboard. Pour le titre, j'ai utilisé des Thickers dorés de la collection et je l'ai placé le long d'une bande en papier à droite de la page. J'ai également ajouté quelques ballons du Thickers pack. J'ai apporté la touche finale à ma page avec quelques fanions en chipboard que j'ai glissés sous les bandes en haut de la page.

Next I turned to the embellishing part. I adorned the photo with pennants from the sticker book, pretty chipboard flowers, and a pink bow from the Take Me Away collection that I topped with another chipboard sticker. For my title, I used gold foam Thickers from the collection and I placed them on the right side of the page along one of the paper strips. I also added cute foam balloons from the Thickers pack. I put the final touch to my happy page with pennants from the chipboard sticker pack that I tucked under the strips at the top of the page.


J'espère que cette page vous donnera envie de vous amuser avec la collection Confetti Wishes et d'utiliser des bandes de papier sur vos projets! Merci de votre visite et à bientôt!

I hope you are inspired to play with the awesome Confetti Wishes collection and to create eye-catching designs using paper strips. Thanks so much for joining me today! See you again soon!


Elodie


lundi 6 août 2018

Love You To The Moon - Pink Paislee


Bonjour à tous!

J'espère que vous avez passé un bon weekend! Je commence cette nouvelle semaine avec une page que vous pouvez retrouver aujourd'hui sur le blog de Pink Paislee. J'ai associé la jolie collection Wild Child avec une photo de ma petite dernière endormie dans la voiture alors qu'elle était bébé.

Hi friends!

I hope you had a great weekend! I'm starting off this new week with a layout that is up today on the Pink Paislee blog. I made a sweet page using the awesome Wild Child collection and a photo of my youngest daughter sleeping in the car back when she was a baby. So cute!


Pour réaliser cette page, j'ai mélangé les deux collections Wild Child. Elles vont vraiment bien ensemble! J'ai commencé par chercher un papier de fond et j'ai choisi le beau papier 09 de la collection masculine. J'aime beaucoup ce joli ciel étoilé. Juste ce qu'il me fallait pour ma photo! Pour aller avec cette photo de ma belle au bois dormant, je suis partie sur un design en couronne et j'ai décidé de coudre une lune sur la page avec du fil blanc et bleu foncé.

To make this layout, I mixed the two Wild Child lines. They really go great together! I started by looking for a background paper and chose the dreamy Paper 09 from the boy line. I love that fun and pretty night sky. Just what I needed for my photo! To go with this cute picture of my sleeping beauty, I went with a wreath design and decided to stitch a big moon on the page using white and dark blue thread.


J'ai matté la photo avec un papier du paper pad Wild Child Girl et je l'ai collée avec de la mousse 3D au centre de la lune. J'ai glissé un onglet avec la date sous la photo et je l'ai ornée de die-cuts et d'un puffy sticker de la collection féminine.

I matted the photo with a paper from the Wild Child Girl 6x6 paper pad and I adhered it on my hand stitched moon with foam tape. I tucked a tab with the date under the picture and adorned it with die cuts and a puffy sticker from the girl line.


J'ai ensuite rempli la lune avec des die-cuts ainsi qu'avec des autocollants des deux collections. Pour le titre, j'ai utilisé des autocollants en chipboard de la collection masculine, je les ai placés sur le cercle que j'ai cousu et j'ai surmonté l'une des lettres avec un cœur autocollant.

Next I filled my hand stitched moon with die cuts as well as cardstock and puffy stickers from the two lines. For the title, I used chipboard stickers from the boy collection, placed them on the stitched circle and topped one of them with a cute puffy heart.


J'ai également ajouté des étoiles de la planche de rub-ons ainsi que des étoiles autocollantes en haut et en bas de la page et j'ai terminé avec quelques gouttes d'encre dorée pour apporter une touche scintillante.

I also added star rub-ons and stickers at the top and at the bottom of the page and I finished with droplets of gold ink to add a bit of shine to my sweet layout.


Merci d'être passé par ici! J'espère que cette page vous donnera envie d'associer les deux jolies collections Wild Child!

Thank you for stopping by today! I hope this page inspires you to mix and match the pretty Wild Child lines!


Elodie


vendredi 3 août 2018

All Good Things Are Wild & Free - Cocoa Vanilla Studio


Bonjour!

Je suis de passage pour partager une nouveau projet que vous pouvez retrouver aujourd'hui sur le blog de Cocoa Vanilla Studio. J'ai fait une page douce et féminine avec la très jolie collection Bohemian Dream ainsi qu'une grande photo de ma fille aînée se promenant sur Pebble Beach en Californie il y a quelques années.

Hi!

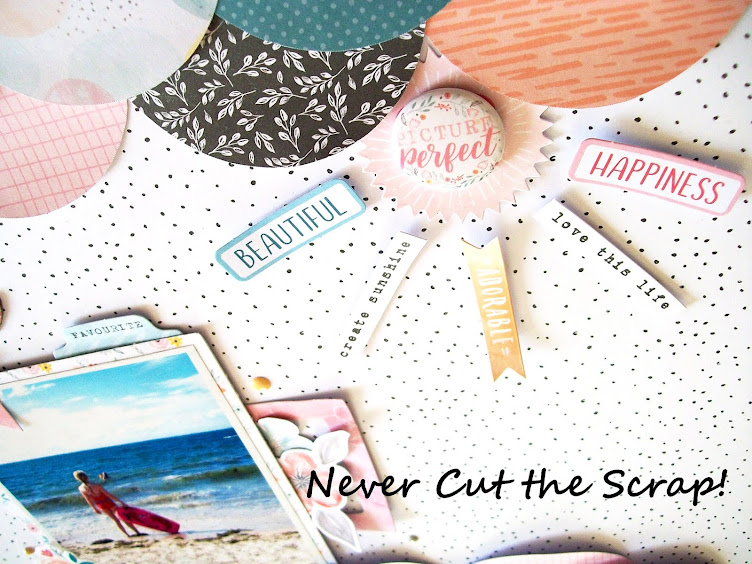
I'm sharing a brand new project on the Cocoa Vanilla Studio blog today. I made a dreamy and girly page using the super pretty Bohemian Dream collection and a large photo of my oldest daughter wandering on Pebble Beach during a trip around California a few years back.


Pour cette page, j'ai utilisé ma couleur préférée avec des papiers et des embellissements roses. J'ai commencé par chercher un papier de fond et j'ai finalement choisi le beau papier Dreamer.

I went with my favorite color for this layout and used pink papers and embellies. I started by looking for a background paper and picked the Dreamer sheet. How pretty is that ombre pattern?


J'ai ensuite coupé ma photo en deux et j'ai cousu les bords avec du fil rose pour apporter plus de détails et de texture à la page. J'ai ensuite collé la partie supérieure de la photo en haut de la page et la partie inférieure en bas. J'aime la façon dont la photo ressort sur le fond rose!

Next I cut the picture in half and I hand stitched the edges with pink thread to add detail and texture to my layout. I then adhered th upper part of the photo at the top of the page and the lower part right at the bottom. I like how the photo stands out against the pink background!


Je me suis ensuite affairée à embellir ma page. J'ai passé en revue la collection à la recherche d'embellissements roses et je les ai placés entre les deux parties de la photo. J'ai utilisé des die-cuts, des découpes en calque, des autocollants en chipboard et en cardstock, un badge ainsi que des cercles que j'ai découpés dans quelques feuilles du paper pad.

Time to start embellishing! I went through my Bohemian Dream stash looking for pink embellies and I arranged them between the top part and the bottom part of the photo. I used die cuts, vellum accents, cardstock and chipboard stickers, a flair button as well as circles that I cut in the 6x6 paper pad.


J'ai également surmonté certains cercles de mots autocollants et j'ai ajouté quelques enamel shapes roses ici et là. Pour le titre, j'ai utilisé une bande que j'ai coupée dans la feuille Boho Bits et je l'ai collée avec de la mousse 3D sur la partie inférieure de la photo.

I also topped a couple of patterned paper circles with word stickers from the accessory sticker sheet and I added a few pink enamel dots and hearts here and there. For the title, I used a strip that I cut in the Boho Bits cut apart sheet and I placed it on the lower part of the picture.


Pour terminer ma page, j'ai orné la photo de quelques bandes de journaling et d'un joli mot en chipboard de la collection.

To finish off my page, I adorned the photo with a couple of journaling strips and a pretty chipboard word.


Merci de vous être arrêté par ici! J'espère que cette page vous donnera envie d'utiliser de grandes photos sur vos pages et de vous amuser avec la collection Bohemian Dream!

Thanks so much for stopping by today! I hope you are inspired to use large photos on your layouts and play with the beautiful Bohemian Dream collection!


Elodie